Cocoa’s NSSavePanel allows one to programmatically add essentially arbitrary interface elements and functionality to it, in the form of an accessory view. In this post, I show a very simple accessory view example: allowing the user to control the file type (that is, suffix) of the file to be saved. I’ll present this in two contexts: first, in a purely Objective-C usage; and second, in the case of using an NSSavePanel inside a C/C++ function. In the latter case, I show an example of using a selector in a separate object, to handle “callbacks”. This post is aimed at novice Cocoa programmers; experienced programmers looking to add a file type selection are encouraged to check out JFImageSavePanel or JAMultiTypeSavePanelController. Apple’s Customizing NSSavePanel shows other uses for the accessory view.
The NSSavePanel allows one to specify one or more file types; for example you could specify several image formats:
NSArray *fileTypes = [NSArray arrayWithObjects:@"jpg", @"gif", @"png", nil];
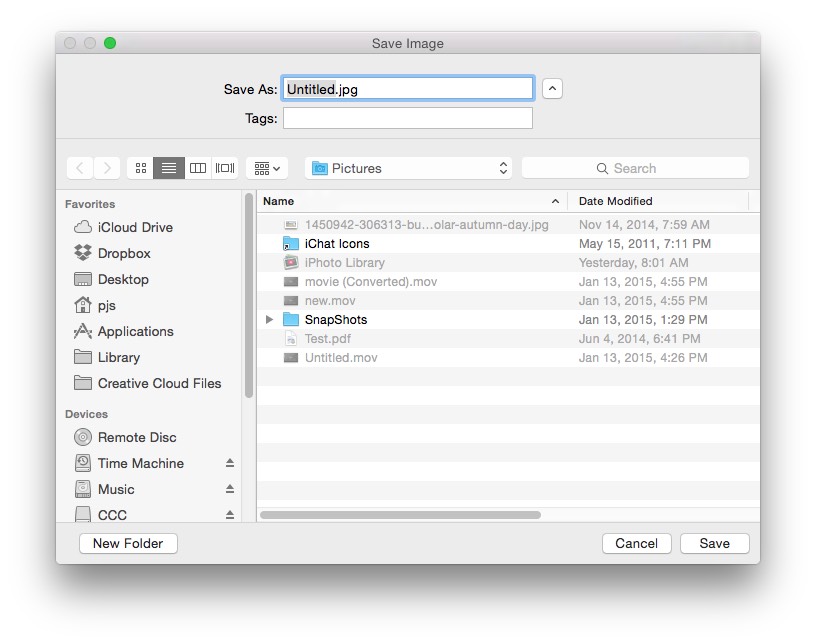
In some UI toolkits, there’s a built-in mechanism that allows the user to switch between types, generally using some pulldown or popup menu, in which the user chooses the file type by suffix or format name. The NSSavePanel does not provide this, so the programmer needs to add it. Here’s an unadorned NSSavePanel, where we’ve used those file types:
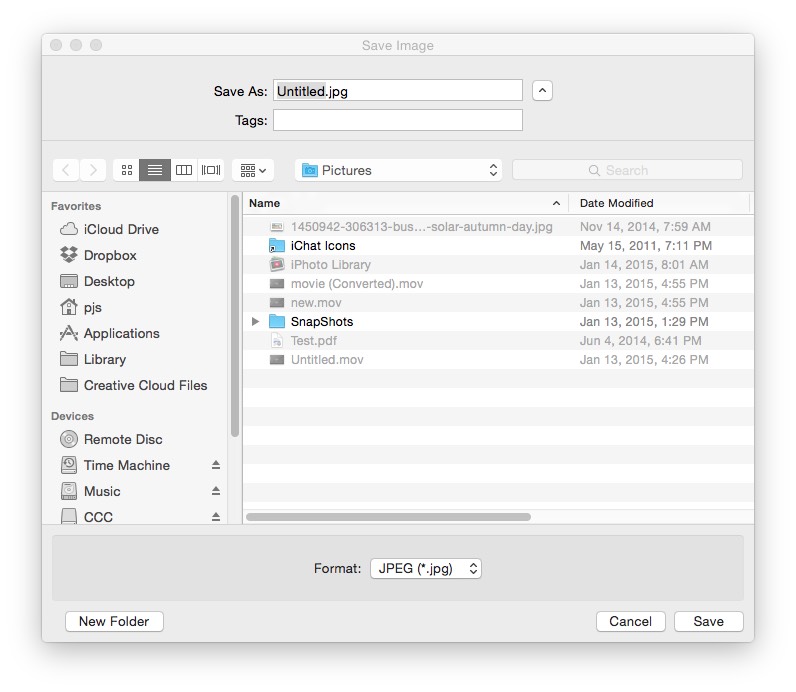
What we want is this:
I created an Xcode project, available on github, that demonstrates how to create a basic save panel, and several approaches for adding an accessory view.
The Basic Save Panel
The demo app’s xib file has several buttons that are used for launching save panels. Here’s the entirety of the code for a basic/unadorned version:
@interface AppDelegate()
@property (nonatomic, strong) NSSavePanel *savePanel;
@end

@implementation AppDelegate

- (void)applicationDidFinishLaunching:(NSNotification *)aNotification {
    // Insert code here to initialize your application
}

- (void)applicationWillTerminate:(NSNotification *)aNotification {
    // Insert code here to tear down your application
}

- (IBAction)launchDefaultSavePanel:(id)sender
{
    NSArray *fileTypesArray = [NSArray arrayWithObjects:@"jpg", @"gif", @"png", nil];
    if (![self savePanel])
        [self setSavePanel:[NSSavePanel savePanel]];

    [[self savePanel] setAllowedFileTypes:fileTypesArray];
    [[self savePanel] setTitle:@"Save Image"];

    if ([[self savePanel] runModal] == NSFileHandlingPanelOKButton) {
        NSURL *file = [[self savePanel] URL];
        NSLog(@"Selected file: %@", file);
    }
}
@end
This gives us that basic save panel shown in the first image in this post.
Adding an Accessory View Programmatically
To add a control for the file type, we’ll use an NSPopUpButton, along with a label, and embed this in a view for layout purposes. This can done programmatically, or by loading UI elements from a Xib file. Here’s a bare-bones programmatic approach:
- (IBAction)launchProgrammaticVersion:(id)sender
{
    NSArray *fileTypesArray = [NSArray arrayWithObjects:@"jpg", @"gif", @"png", nil];
    if (![self savePanel])
        [self setSavePanel:[NSSavePanel savePanel]];

    [[self savePanel] setAllowedFileTypes:fileTypesArray];
    [[self savePanel] setTitle:@"Save Image"];

    NSArray *buttonItems   = [NSArray arrayWithObjects:@"JPEG (*.jpg)", @"GIF (*.gif)", @"PNG (*.png)", nil];
    NSView  *accessoryView = [[NSView alloc] initWithFrame:NSMakeRect(0.0, 0.0, 200, 32.0)];
    NSTextField *label = [[NSTextField alloc] initWithFrame:NSMakeRect(0, 0, 60, 22)];
    [label setEditable:NO];
    [label setStringValue:@"Format:"];
    [label setBordered:NO];
    [label setBezeled:NO];
    [label setDrawsBackground:NO];

    NSPopUpButton *popupButton = [[NSPopUpButton alloc] initWithFrame:NSMakeRect(50.0, 2, 140, 22.0) pullsDown:NO];
    [popupButton addItemsWithTitles:buttonItems];
    [popupButton setAction:@selector(selectFormat:)];

    [accessoryView addSubview:label];
    [accessoryView addSubview:popupButton];

    [[self savePanel] setAccessoryView:accessoryView];

    if ([[self savePanel] runModal] == NSFileHandlingPanelOKButton) {
        NSURL *file = [[self savePanel] URL];
        NSLog(@"Selected file: %@", file);
    }
}
The API for adding an accessory view is just that: you only get to specify a single view; so, I created accessoryView as the “container” for the UI elements. To this, I add a label and an NSPopUpButton, populating the latter with the various choices we’ll present to the user. Note that this sort of ad-hoc “layout” is not really recommended — if you’re creating UI elements programmatically, the actual length of the label should be used, and constraints should be employed.
The File Type “Callback”
The selector used in [popupButton setAction:@selector(selectFormat:)] handles the user’s interactions with type selection popup. This setAction function is called whenever the user changes the popup button.
- (void)selectFormat:(id)sender
{
    NSPopUpButton *button                 = (NSPopUpButton *)sender;
    NSInteger      selectedItemIndex      = [button indexOfSelectedItem];
    NSString      *nameFieldString        = [[self savePanel] nameFieldStringValue];
    NSString      *trimmedNameFieldString = [nameFieldString stringByDeletingPathExtension];
    NSString      *extension;

    if (selectedItemIndex == 0)
        extension = @"jpg";
    else if (selectedItemIndex == 1)
        extension = @"gif";
    else
        extension = @"png";

    NSString *nameFieldStringWithExt = [NSString stringWithFormat:@"%@.%@", trimmedNameFieldString, extension];
    [[self savePanel] setNameFieldStringValue:nameFieldStringWithExt];
    [[self savePanel] setAllowedFileTypes:@[extension]];
}
Here, all we’re doing is simply changing the suffix of the file name that is shown at the top of the save panel, to match the current file format choice.
Update: if the user’s Finder Preference “Show all filename extensions” is off, or the panel’s extensionHidden property is YES, then the nameFieldStringValue may not get updated with the desired extension. A workaround (fix?) is to restrict the allowed file types to only the specified one, and then the URL for the selected file will get the correct extension.
Adding an Accessory View Defined in an XIB File
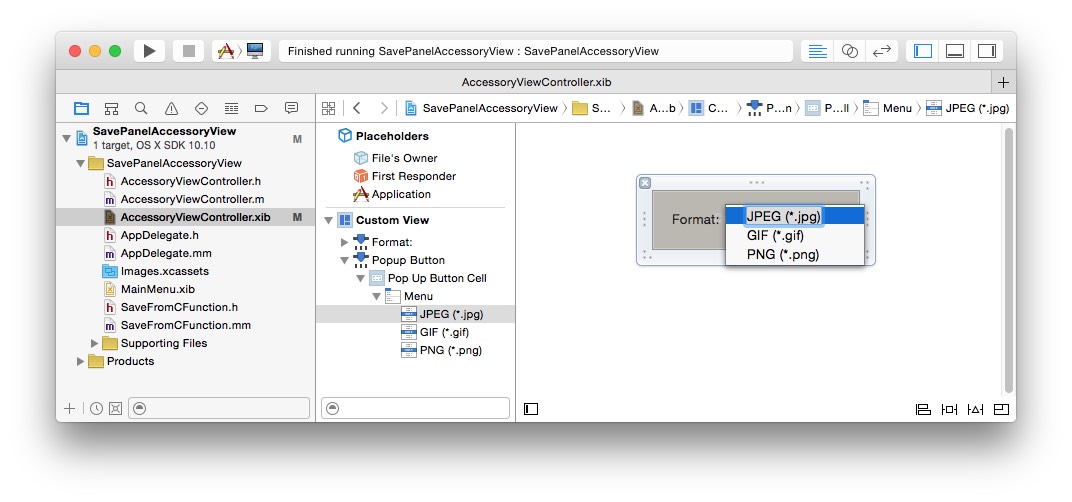
Generally, it might be preferable to craft the accessory view in Interface Builder. Here, I added a new NSViewController (cleverly named “AccessoryViewController”) and corresponding XIB file, and added a Label and PopUpButton, initializing the button’s menu items with the file type strings, corresponding to what I did programmatically:
The action selector in the view controller is exactly the same as I used in the programmatic approach. In order to do this, I added a property to the AccessoryViewController for the save panel:
@interface AccessoryViewController : NSViewController
@property (nonatomic, weak) NSSavePanel *savePanel;
@end
The code, then, to launch the NSSavePanel with this XIB-defined accessory view is simple — we just create an AccessoryViewController by loading it from the nib file, and add it to the NSSavePanel:
- (IBAction)launchNibVersion:(id)sender
{
    NSArray *fileTypesArray = [NSArray arrayWithObjects:@"jpg", @"gif", @"png", nil];
    if (![self savePanel])
        [self setSavePanel:[NSSavePanel savePanel]];

    [[self savePanel] setAllowedFileTypes:fileTypesArray];
    [[self savePanel] setTitle:@"Save Image"];

    if (![self accessoryVC]) {
        AccessoryViewController *aVC = [[AccessoryViewController alloc] initWithNibName:@"AccessoryViewController"
                                                                                 bundle:[NSBundle mainBundle]];
        [self setAccessoryVC:aVC];
        [[self accessoryVC] setSavePanel:[self savePanel]];
    }
    [[self savePanel] setAccessoryView:[[self accessoryVC] view]];

    if ([[self savePanel] runModal] == NSFileHandlingPanelOKButton) {
        NSURL *file = [[self savePanel] URL];
        NSLog(@"Selected file: %@", file);
    }
}
Launching an NSSavePanel From a C/C++ Function
In the preceding examples, the functions used to launch the save panel in these three versions were simply stuck in the app delegate, to keep the code in the demo as simple as possible. In general, the code would usually be in one or the other Cocoa objects (e.g. a subclassed NSViewController).
Occasionally, one might be coding in a context that would use a C/C++ function to launch a save panel. By implementing such a function in a “.mm” file, you can mix C, C++, and Objective-C, so code almost exactly the same as the body of our launchDefaultSavePanel will work:
static NSSavePanel *savePanel;

std::string saveFileDefault()
{
    NSArray *fileTypesArray = [NSArray arrayWithObjects:@"jpg", @"gif", @"png", nil];

    if (!savePanel)
        savePanel = [NSSavePanel savePanel];

    [savePanel setAllowedFileTypes:fileTypesArray];
    [savePanel setTitle:@"Save Image"];

    if ([savePanel runModal] == NSFileHandlingPanelOKButton) {
        NSURL *URL = [savePanel URL];
        if (URL) {
            NSString *path = [URL path];
            return std::string([path UTF8String]);
        }
    }
    return std::string();
}
Of course, this does not yet have the file type UI element. But we’re inside a C/C++ function, so what do we do about the [popupButton setAction:@selector(selectFormat:)]; that we’d need to add?
In Cocoa, it’s possible to “tell” an object that it can use a selector from another, otherwise unrelated, object. So, we need to have an object that provides the necessary selector. Of course we already have one of those : the AccessoryViewController. So our C/C++ function looks like this:
static AccessoryViewController *accessoryVC;

std::string saveFileNibVersion()
{
    NSArray *fileTypesArray = [NSArray arrayWithObjects:@"jpg", @"gif", @"png", nil];

    if (!savePanel)
        savePanel = [NSSavePanel savePanel];

    if (!accessoryVC) {
        accessoryVC = [[AccessoryViewController alloc] initWithNibName:@"AccessoryViewController"
                                                                bundle:[NSBundle mainBundle]];
        [accessoryVC setSavePanel:savePanel];
    }

    [savePanel setAllowedFileTypes:fileTypesArray];
    [savePanel setTitle:@"Save Image"];
    [savePanel setAccessoryView:[accessoryVC view]];

    if ([savePanel runModal] == NSFileHandlingPanelOKButton) {
        NSURL *URL = [savePanel URL];
        if (URL) {
            NSString *path = [URL path];
            return std::string([path UTF8String]);
        }
    }

    return std::string();
}
What about doing this programmatically? We can of course create the label and NSPopupButton programmatically as we did in launchNibVersion . But, how do we provide the action selector? We can do this by creating an object that’s much like our AccessoryViewController, in that it provides that necessary selectFormat function and contains a pointer to the save panel:
@interface PopUpButtonHandler : NSObject

@property (nonatomic, weak) NSSavePanel *savePanel;
- (instancetype)initWithPanel:(NSSavePanel *)panel;
- (void)selectFormat:(id)sender;
@end

@implementation PopUpButtonHandler

- (instancetype)initWithPanel:(NSSavePanel *)panel
{
    self = [super init];
    if (self)
        _savePanel = panel;
    return self;
}

- (void)selectFormat:(id)sender
{
    NSPopUpButton *button                 = (NSPopUpButton *)sender;
    NSInteger      selectedItemIndex      = [button indexOfSelectedItem];
    NSString      *nameFieldString        = [[self savePanel] nameFieldStringValue];
    NSString      *trimmedNameFieldString = [nameFieldString stringByDeletingPathExtension];
    NSString      *extension;

    if (selectedItemIndex == 0)
        extension = @"jpg";
    else if (selectedItemIndex == 1)
        extension = @"gif";
    else
        extension = @"png";

    NSString *nameFieldStringWithExt = [NSString stringWithFormat:@"%@.%@", trimmedNameFieldString, extension];
    [[self savePanel] setNameFieldStringValue:nameFieldStringWithExt];
    [[self savePanel] setAllowedFileTypes:@[extension]];
}

@end
The final piece of the puzzle: how do we use this object, so its implementation of selectFormat can be used to handle the programmatically created NSPopUpButton? Note that the NSButton class uses NSButtonCell to implement its user interface; that latter class is subclassed from NSCell, which offers a -setTarget function, which sets the target object to receive action messages. So we create a PopUpButtonHandler , and tell the popup button to use it:
static PopUpButtonHandler *popUpButtonHandler;

std::string saveFileProgrammaticVersion()
{
    NSArray *fileTypesArray = [NSArray arrayWithObjects:@"jpg", @"gif", @"png", nil];

    if (!savePanel)
        savePanel = [NSSavePanel savePanel];

    if (!popUpButtonHandler)
        popUpButtonHandler = [[PopUpButtonHandler alloc] initWithPanel:savePanel];

    [savePanel setAllowedFileTypes:fileTypesArray];
    [savePanel setTitle:@"Save Image"];

    NSArray *buttonItems   = [NSArray arrayWithObjects:@"JPEG (*.jpg)", @"GIF (*.gif)", @"PNG (*.png)", nil];
    NSView  *accessoryView = [[NSView alloc] initWithFrame:NSMakeRect(0.0, 0.0, 200, 32.0)];

    NSTextField *label = [[NSTextField alloc] initWithFrame:NSMakeRect(0, 0, 60, 22)];
    [label setEditable:NO];
    [label setStringValue:@"Format:"];
    [label setBordered:NO];
    [label setBezeled:NO];
    [label setDrawsBackground:NO];

    NSPopUpButton *popupButton = [[NSPopUpButton alloc] initWithFrame:NSMakeRect(50.0, 2, 140, 22.0) pullsDown:NO];
    [popupButton addItemsWithTitles:buttonItems];
    [popupButton setTarget:popUpButtonHandler];
    [popupButton setAction:@selector(selectFormat:)];

    [accessoryView addSubview:label];
    [accessoryView addSubview:popupButton];

    [savePanel setAccessoryView:accessoryView];

    if ([savePanel runModal] == NSFileHandlingPanelOKButton) {
        NSURL *URL = [savePanel URL];
        if (URL) {
            NSString *path = [URL path];
            return std::string([path UTF8String]);
        }
    }

    return std::string();
}
I hope this exercise shows how easy it is to add functionality to the NSSavePanel (as well as to the NSOpenPanel) by adding an accessory view. The excursion into using Cocoa inside a strictly C/C++ function allowed me to demonstrate the use of the -setTarget function in the NSCell class; this functionality is significant because the NSCell is a very fundamental class in Cocoa (particularly its NSActionCell subclass).


