In a typical OS X application, UI elements are often created in Interface Builder and stored inside the application bundle, in the form of one or more nib files. Bundles are central to Apple’s application ecosystem, and the documentation on them is extensive: The Bundle Programming Guide and Code Loading Programming Topics, for example, describe how to create frameworks and application plug-ins, how to load code and resources, and on and on. Impressive, but rather daunting, and the examples they provide often obfuscate the basics. This post shows a very simple example of how an “external” bundle can be loaded on demand, and provide functionality and UI elements to the main program. This is a detailed, step-by-step tutorial that explains a fairly simple use of bundles, so the intended audience is Cocoa programmers who have enough experience to create custom window or view controllers, but who have not yet dealt with creating or using bundles that are created separately from the application.
Code for the projects can be found on github.
The intention of this post is to illustrate some very basic aspects of loading code and UI from a bundle that’s not the app’s main bundle. Later installments may provide other examples that illustrate more of what can be done with bundles, plugins, etc.
But, it turns out that even this initial, and very simple, technique can be quite useful as it is: in a cross-platform application, additional functionality may be added in a generic fashion by dynamically loading a shared library with dlopen() and dlsym() on OS X and Linux, or LoadLibrary() and GetProcAddress() on Windows. In such cases, some of the solutions available on OS X cannot easily be used directly, if the main program is to use such a generic scheme. In an OS X-only application, the mechanisms described in Apple’s documentation I linked to can and probably should be used instead.
Creating a Modal Window Within the App’s Bundle
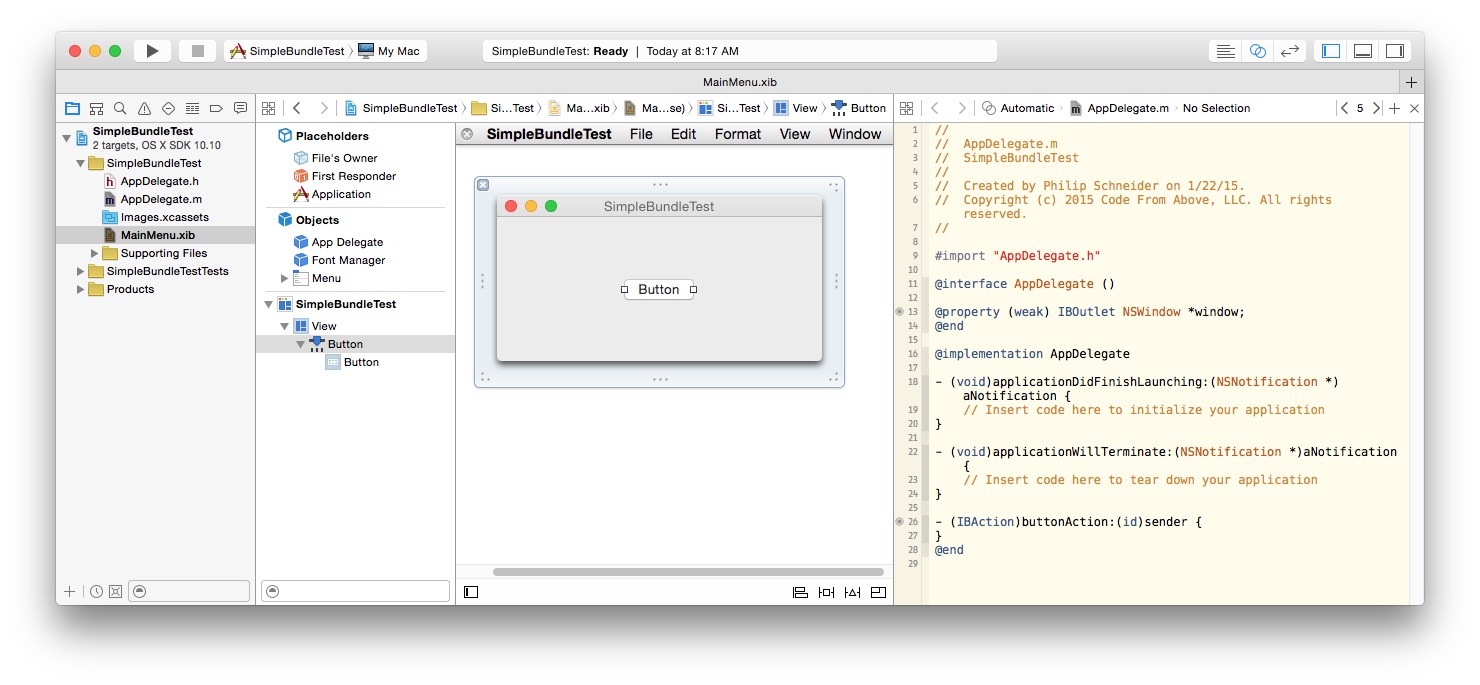
We’ll start off by creating a new Xcode project of type “Cocoa Application”; I called mine “SimpleBundleTest”. Add a single button to the window in its nib file, and create an action function for the button, giving something like this:
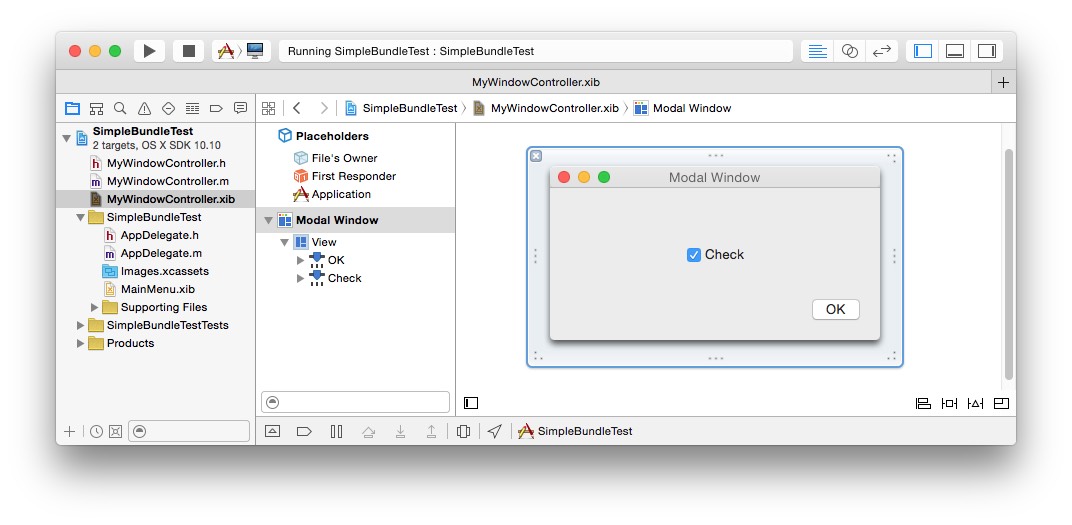
Create a new file of type “Cocoa Class” named MyWindowController, making it a subclass of NSWindowController. Add a check box and an OK button, adding a public IBOutlet for the check box, and an action selector for the OK button:
The interface/header file for MyWindowController should look something like this:
#import <Cocoa/Cocoa.h>

@interface MyWindowController : NSWindowController
@property (weak) IBOutlet NSButton *checkBox;
@end
and the implementation like this:
#import "MyWindowController.h"
@interface MyWindowController ()
@end

@implementation MyWindowController

- (void)windowDidLoad {
    [super windowDidLoad];
}

- (IBAction)okAction:(id)sender {
    [NSApp stopModalWithCode:NSModalResponseOK];
    [self.window close];
}
@end
Now, we’ll modify the app delegate to use this custom window controller. Import the window controller’s header file, add a property to the app delegate to hold an instance of MyWindowController, and add code to the app delegate’s sole button action selector to show the window modally. The app delegate should look like this:
#import "AppDelegate.h"
#import "MyWindowController.h"

@interface AppDelegate ()
@property (weak) IBOutlet NSWindow *window;
@property (nonatomic, strong) MyWindowController *testWindowController;
@end

@implementation AppDelegate

- (void)applicationDidFinishLaunching:(NSNotification *)aNotification {
}

- (void)applicationWillTerminate:(NSNotification *)aNotification {
}

- (IBAction)buttonAction:(id)sender {
    // Create the modal controller & its window
    if (!_testWindowController)
        _testWindowController = [[MyWindowController alloc] initWithWindowNibName:@"MyWindowController"];

    // Show window
    [_testWindowController showWindow:self];
    [NSApp runModalForWindow:[_testWindowController window]];

    // Get the checkbox state
    NSInteger state  = [[_testWindowController checkBox] state];
    NSLog(@"state : %ld", (long)state);
}
@end
This is just old-school boilerplate Cocoa code: we make an instance of MyWindowController by initializing it from its nib file inside the app bundle, using its name. We launch the window modally, and when we return, we check the state of its check box and print it to the debug console.
Creating a Separate App and Window Controller Bundle
None of this yet should be anything new or challenging, but I only went through it in any sort of detail so we can directly compare it to the process of creating and using a bundle that’s not compiled as part of the application itself.
We could simply create some new target or targets in the SimpleBundleTest project, reusing much of the same code. However, for clarity we’ll create new projects for both the app and the separate bundle. Start by creating an application project just as before; this time, I called mine “ExternalBundleTest”. As before, add a single button and connect it to an action selector, giving you a project exactly like SimpleBundleTest, prior to adding the custom window controller and related code to it.
Now, we’ll create a project to hold the bundle. Create a new Xcode project, selecting the Bundle template on the “Framework & Library” panel; I cleverly called mine “ExternalBundle”:

Now, you can go through exactly the same steps as before, in creating a custom window controller “MyWindowController”. Or, you could “cheat” a bit and simply drag MyWindowController.h, MyWindowController.m, and MyWindowController.xib from the SimpleBundleTest project, into the ExternalBundle project (being sure to check the “Copy files if necessary” box). Compiling the project now will create the product “ExternalBundle.bundle”.
The final step in creating the separate bundle is to edit the Info.plist file: find the “Principal Class” property, and set its value to “MyWindowController”:
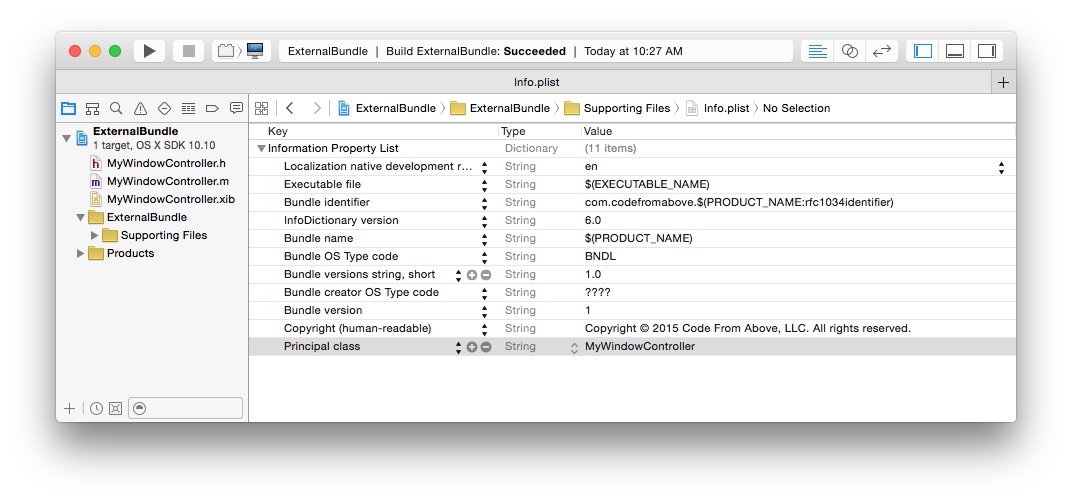 This will be central to our using this bundle in the ExternalBundleTest project.
Using an External Bundle
Now that we have this external bundle created, we need to hook it up into our ExternalBundleTest app; all of this is done inside that project’s app delegate. Start by importing the header for MyWindowController, and creating a property to hold an instance of it (just as we did when adding one to the SimpleBundleTest project). The code should look like this:
#import "AppDelegate.h"
#import "MyWindowController.h"

@interface AppDelegate ()

@property (weak) IBOutlet NSWindow *window;
@property (nonatomic, strong) MyWindowController *testWindowController;

@end
You can compile and run the app at this point, even though we have a property that’s not “supported” by any code compiled as part of, or linked into, the project. This isn’t really surprising: so long as we don’t try to make any use of this property, there’s no problem.
The problem now can be easily stated: how do we use the ExternalBundle.bundle to create an instance of MyWindowController, so we can use it in our app delegate? It turns out to be very much like what we did in SimpleBundleTest: create it by initializing one from a nib file in a bundle; it’s just going to be a different bundle, and a very slightly different process.
The app has to know about the MyWindowController class, in order to create an instance of that class. In SimpleBundleTest, this was not a problem because we compiled the implementation of that class into the app itself. But, when the implementation is entirely in a separate bundle, we have a chicken-and-egg problem: we need the class in order to create an instance, but the class is implemented elsewhere and not available until we somehow “link” it in.
We’ll again be instantiating MyWindowController inside the app’s button action selector. What we’ll need to do can be described in pseudocode:
{
    - Get the path to the external bundle file
    - Create an NSBundle from that file
    - Get the class object we'll need for MyWindowController
    - Create an instance of MyWindowController from the class object
}
We can then use that instance exactly as we did in SimpleBundleTest.
For simplicity, we’re going to assume that the external bundle can be found in the same folder as ExternalBundleTest.app, so at this point, you should copy ExternalBundle.bundle from Build/Products/Debug (or Release) to the corresponding folder in the ExternalBundleTest project. This allows us to get the path and create an NSBundle object:
NSString *bundlePath = @"./ExternalBundle.bundle";
NSBundle *bundle     = [NSBundle bundleWithPath:bundlePath];
Now comes the “magic” part: getting the class we need in order to instantiate MyWindowController. Recall that in the ExternalBundle’s Info.plist file, we specified MyWindowController as the value for the “Principal class” property. The reason for this is just exactly so we “export” this class to code that has a handle to our bundle:
Class someClass = [bundle principalClass];
With this class in hand, we can then instantiate an object of that class (that is, a MyWindowController):
id instance = [[someClass alloc] initWithWindowNibName:@"MyWindowController"];
if (![instance isKindOfClass:[NSWindowController class]]) {
    NSLog(@"Bad class??");
    return;
}
_testWindowController = (MyWindowController*)instance;
Note that the instantiation command is very much like the one we used in SimpleBundleTest, the only differences really being which class we used, and in which bundle it was defined and implemented. The complete code, then, looks like this:
- (IBAction)buttonAction:(id)sender {
    if (![self testWindowController]) {
        //
        // Gives the path to the .app. Can get the "separate bundle" path
        // relative to this
        //
        NSString *bundlePath = @"./ExternalBundle.bundle";
        NSBundle *bundle     = [NSBundle bundleWithPath:bundlePath];

        Class someClass = [bundle principalClass];
        id    instance  = [[someClass alloc] initWithWindowNibName:@"MyWindowController"];
        if (![instance isKindOfClass:[NSWindowController class]]) {
            NSLog(@"Bad class??");
            return;
        }

        _testWindowController = (MyWindowController*)instance;
    }

    // Show window
    [_testWindowController showWindow:self];
    [NSApp runModalForWindow:[_testWindowController window]];

    // Get the checkbox state
    NSInteger state  = [[_testWindowController checkBox] state];
    NSLog(@"state : %ld", (long)state);
}
Compiling and running this will give you exactly the same behavior as we had in SimpleBundleTest. It may seem like “magic”, but due to the dynamic nature of Objective-C, and how bundle/nib loading works, we can be sure that that generic Class object, and the id we instantiate from it are genuinely a MyWindowController class and MyWindowController object, respectively. Indeed, if we run this in the debugger, and stop before we check the instance, we can see that the runtime knows this:

So, the isKindOfClass test we did is not really necessary, and would only serve to protect us from a programming error, in which we mistyped something, or used the wrong bundle.
Note: for simplicity, I put the external bundle next to the app, so I wouldn’t have to dedicate much code to locating the bundle. In a real app, you’d want to store it somewhere more sensible. Apple’s relevant document has some information and sample code that deals with finding bundles.
Next Steps
I’ve presented this in a way I think makes it most clear that getting code/UI resources out of an external bundle is really not very different than getting the same out of the app’s main bundle. The app, by way of importing the header for MyWindowController, is able to make direct use of properties of that class. This means there’s a tight coupling between the app and the implementation of the external bundle.
I also alluded to how this mechanism is fairly directly useful in a cross-platform application that uses “manual” run-time loading of shared libraries in order to extend its functionality. That rather generic scheme allows one to replace such a shared library with a new version (bug fixes, performance enhancements, better UI, etc.), by simply continuing to export the same functions to the main app as did the previous version. Given this benefit, the sort of tight coupling between code in the shared library and the bundle implementing its UI may be undesirable: a change in the definition/implementation of the resources in the bundle generally requires a change to the code using it.
In our particular example, the calling really didn’t have to know about how it got whatever value was represented by the check box’s state, but only that it was able to do so. More specifically, it didn’t need to know the type of object involved. Fortunately, Objective-C provides us with a generic mechanism for calling object’s functions, without having to know about the object’s type: Protocols.
I’ll address these issues in an update to this post, or a new “Part 2” post.